What is Earthdata Search?
Earthdata Search is the powerful search and discovery application for NASA’s Earth Observing System Data and Information System (EOSDIS). Developed by NASA’s Earth Science Data and Information System (ESDIS) Project and hosted in the Earthdata Cloud, Earthdata Search pulls together a number of EOSDIS services: the Common Metadata Repository (CMR), Global Imagery Browse Services (GIBS), EOSDIS Distributed Active Archive Center (DAAC) services, Harmony, and Earthdata Login. Using CMR as a foundation, Earthdata Search enables sub-second searches through the nearly 50 petabytes (PB) of data in the EOSDIS collection.
Earthdata Search provides the only means for data discovery, filtering, visualization, and access across all of NASA’s Earth science data holdings. This tool allows a user to search by any topic, collection, or location. Using Global Imagery Browse Services (GIBS), Earthdata Search enables high-performance, highly available data visualization when applicable. Learn more about Earthdata Search.
What Is the GHRC Search Portal?
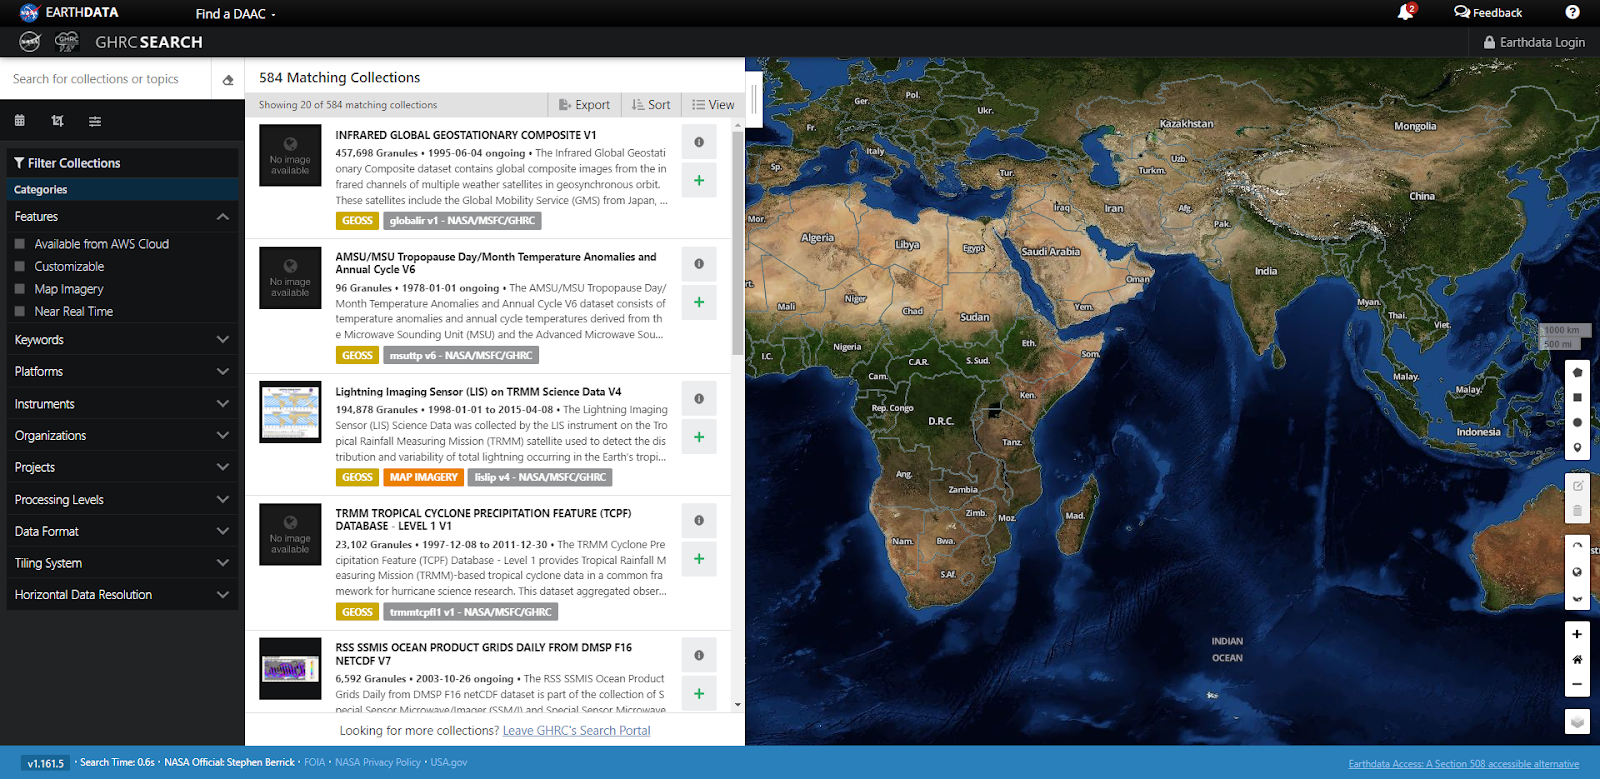
How Do I Use the GHRC Search Portal?
- Use the interactive map on the left to select a subregion
- Specify a study period using the temporal date range
- Specify a science keyword, instrument, platform, project, processing level, data format, tiling system, or horizontal data resolution
- Look for a thematic collection of data
| Icon | Description |
|
|
Select this icon to view the collection details. This provides metadata information, such as temporal extent, format, science keywords, citation, user guide, and other related documentation. |
|
|
This icon is used to download multiple collections or multiple granules, and it appears in two separate places. In the collection view, this icon will add the entire collection to a ‘project’. This is how multiple collections can get downloaded at one time. In the granule view, this icon will add a single granule to a ‘project’.* |
|
|
Select this icon to download a single granule. |
|
|
This icon can be found in the granule view. Select this icon to add a collection to a ‘project’.* |
*More information on how to use these icons to download data can be found in the ‘How Do I Get The Data?’ section.
What Is Earthdata Login?
How Do I Get The Data?
Downloading a single granule:
-
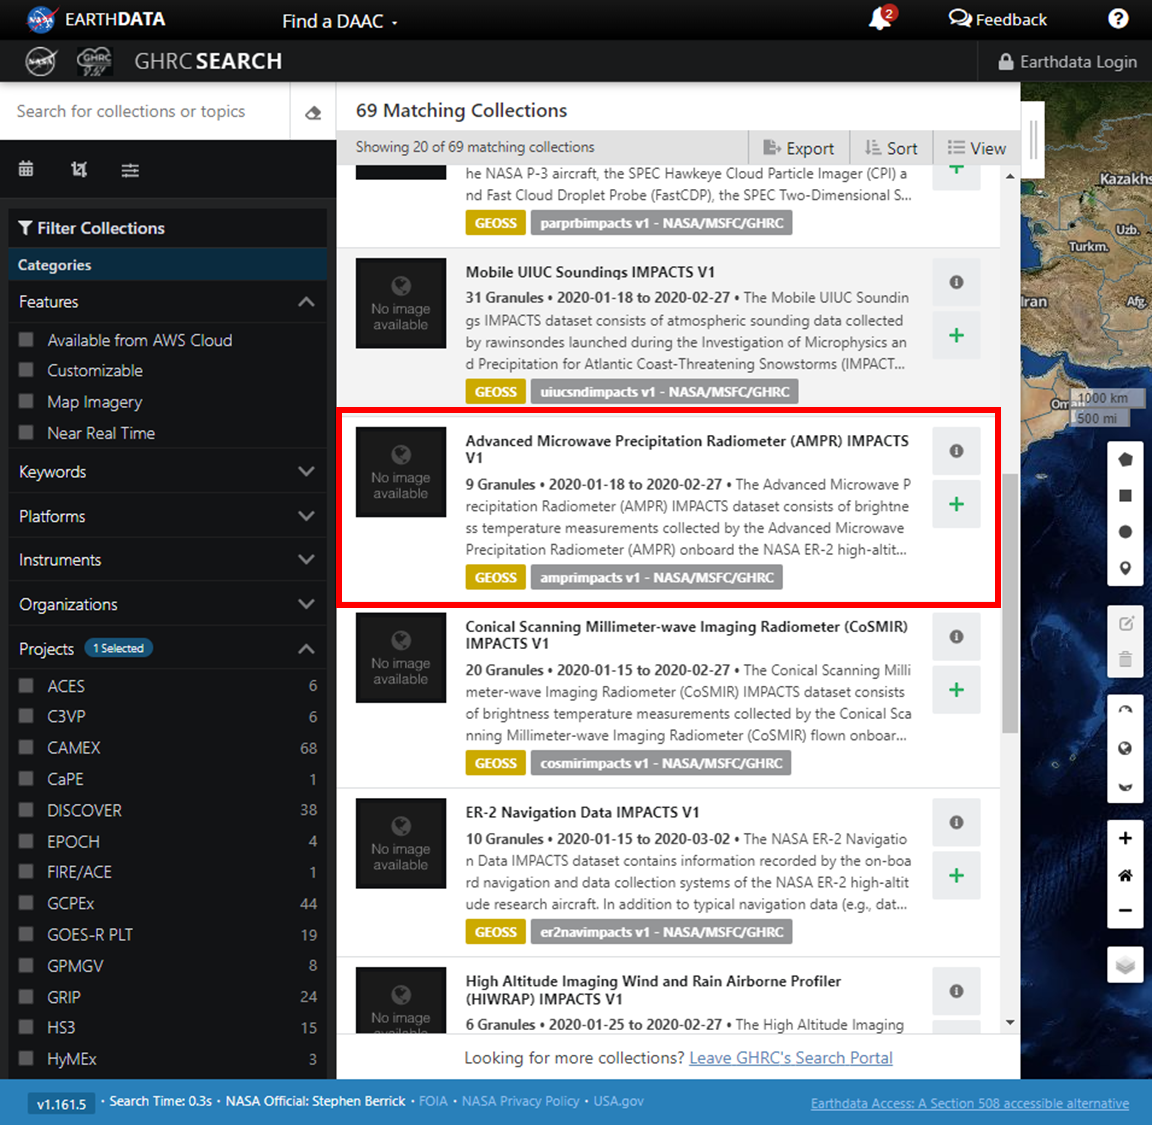
Click on the desired collection to view the granules.
-
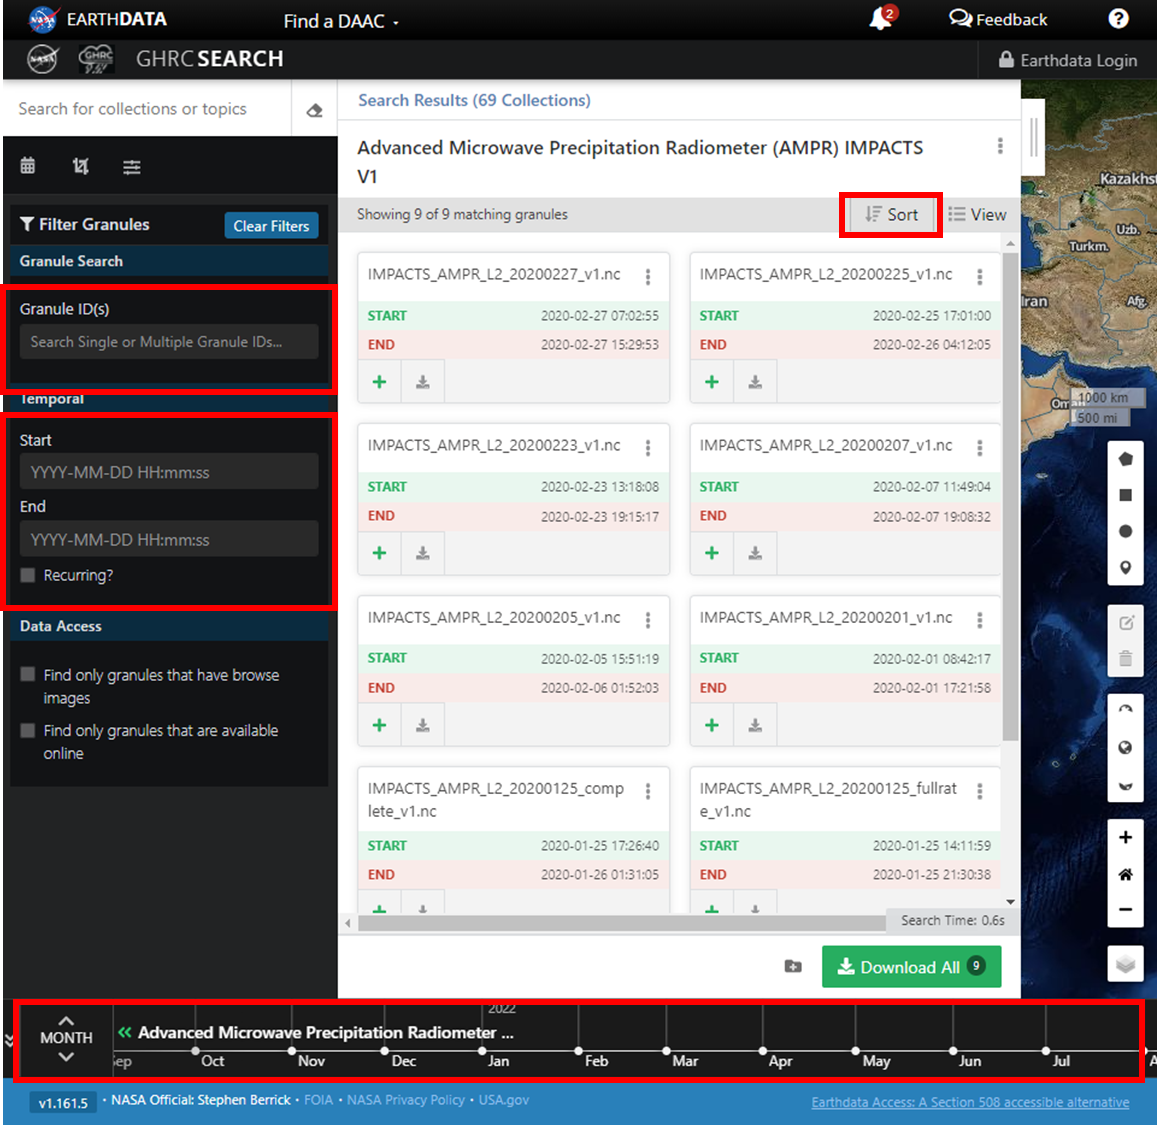
Sort, search, filter, and/or adjust the time bar as needed to find desired granules.
-
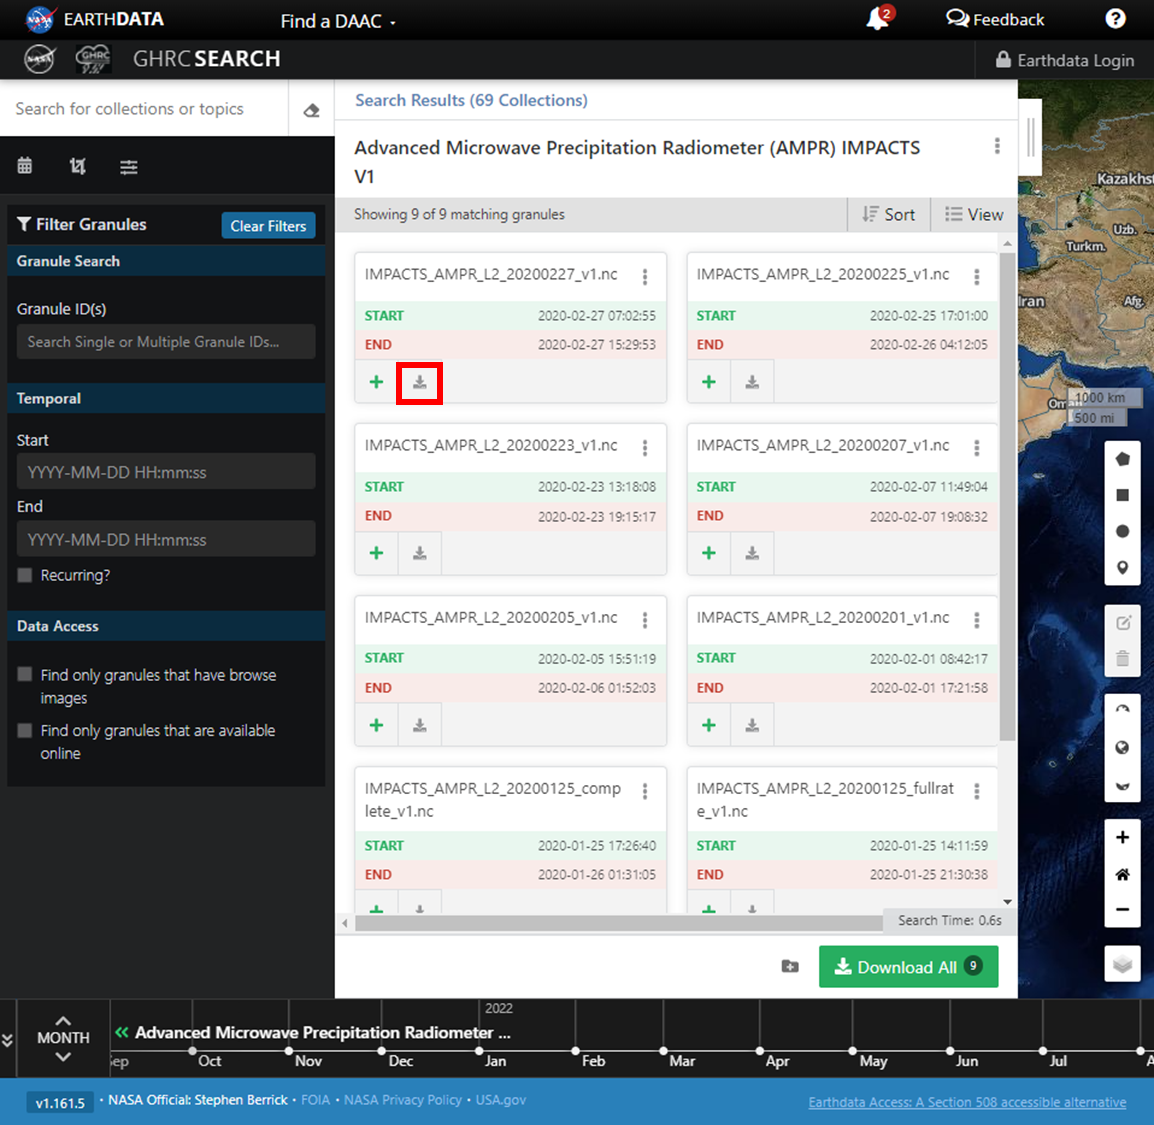
Click on the Download single granule data button on the granule of interest.
Downloading multiple granules:
-
Click on collection to view the granules.
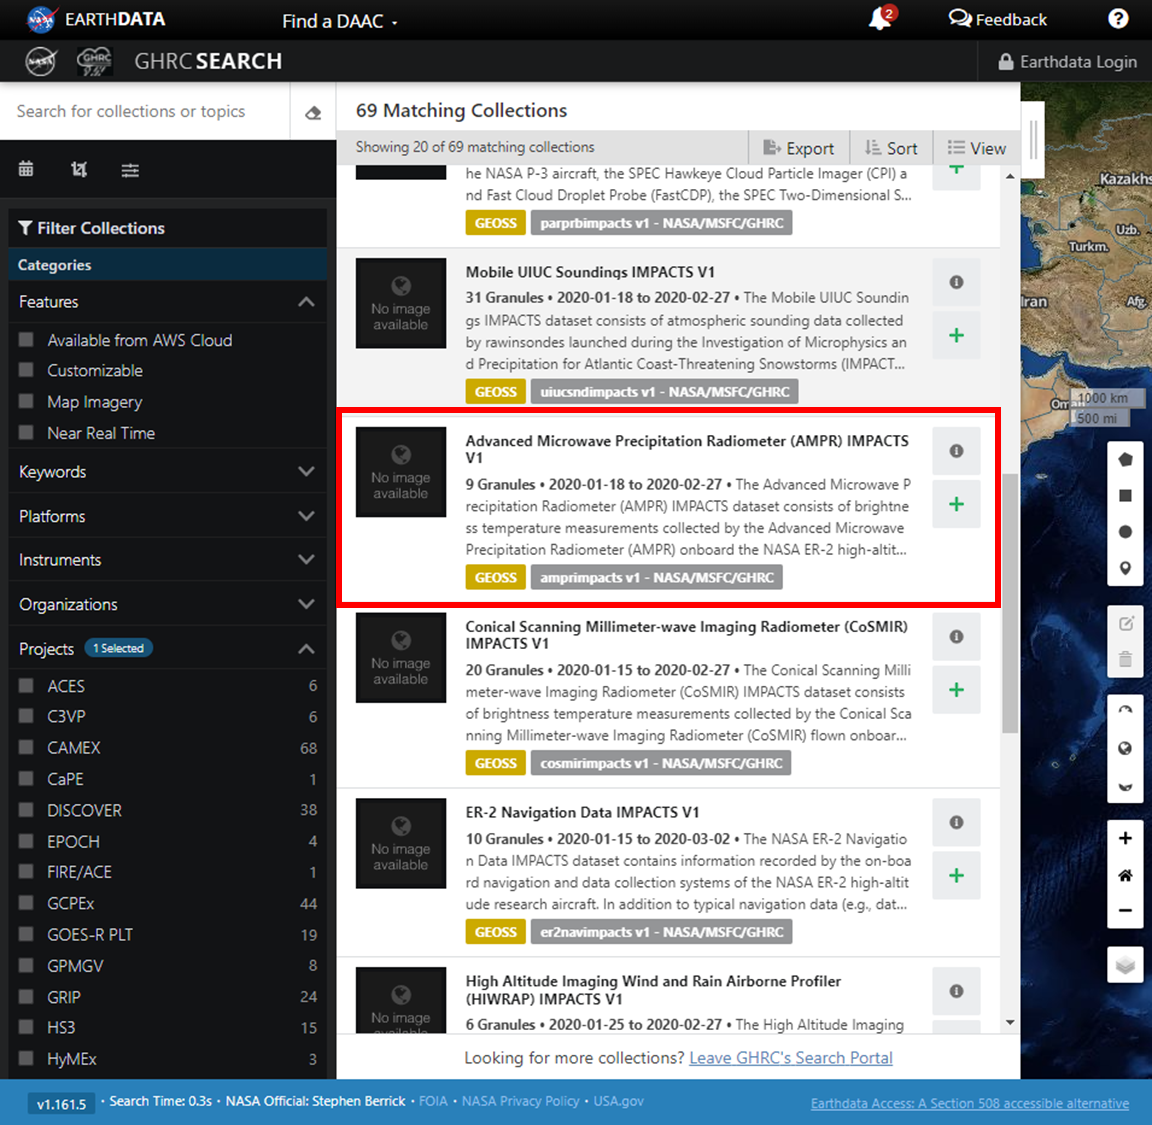
-
Filter the granules as necessary and click ‘Add to project’. Only the granules that match the spatial and temporal filter parameters will be downloaded or added to the project.
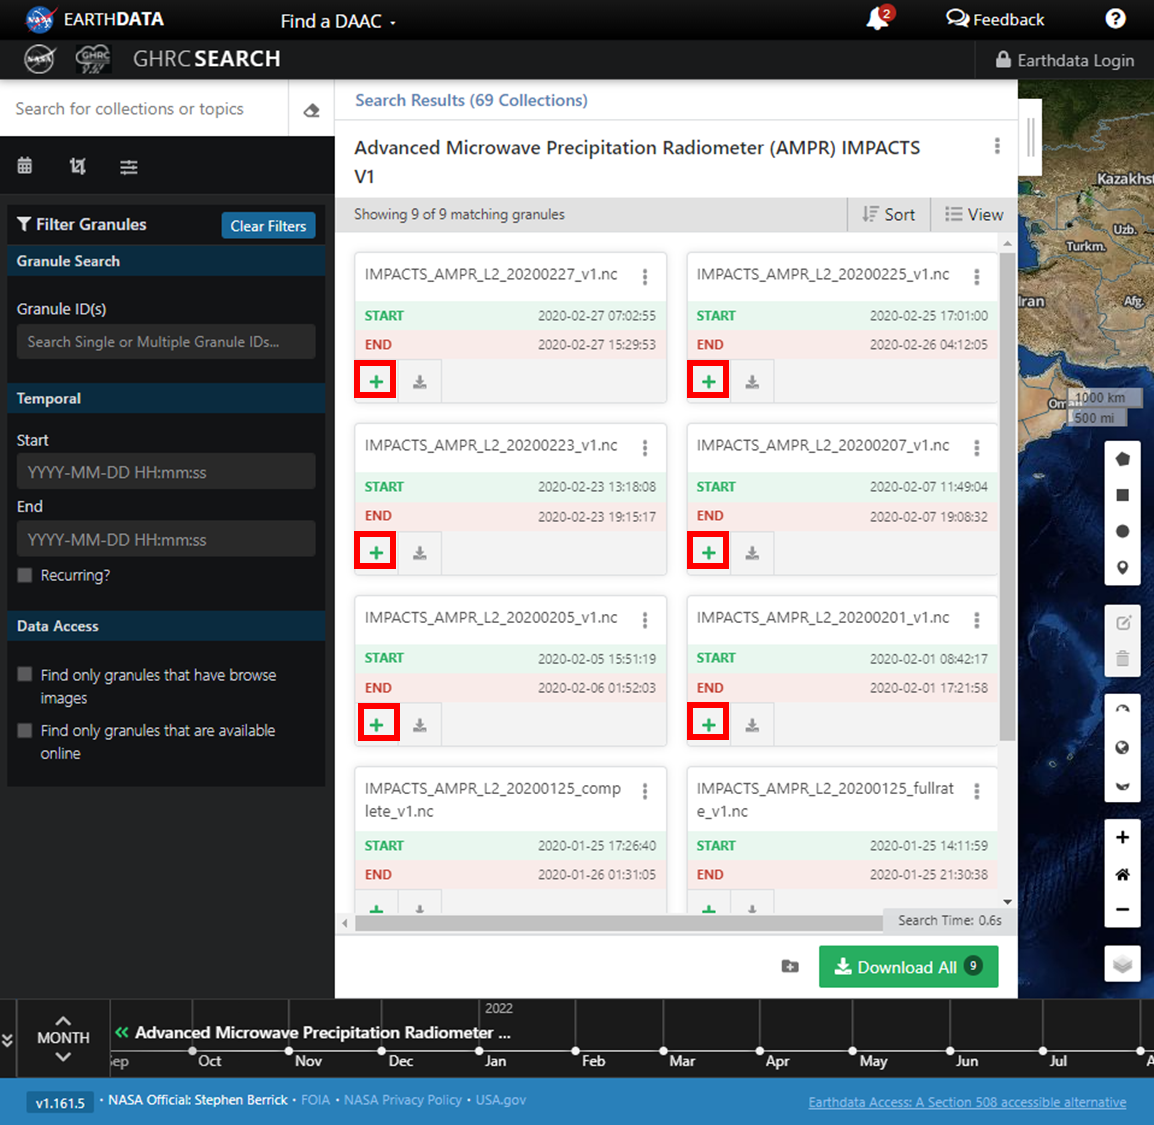
-
Once the user has added all of their desired collection to ‘My Project’, click on ‘My Projects’ to view the download options.
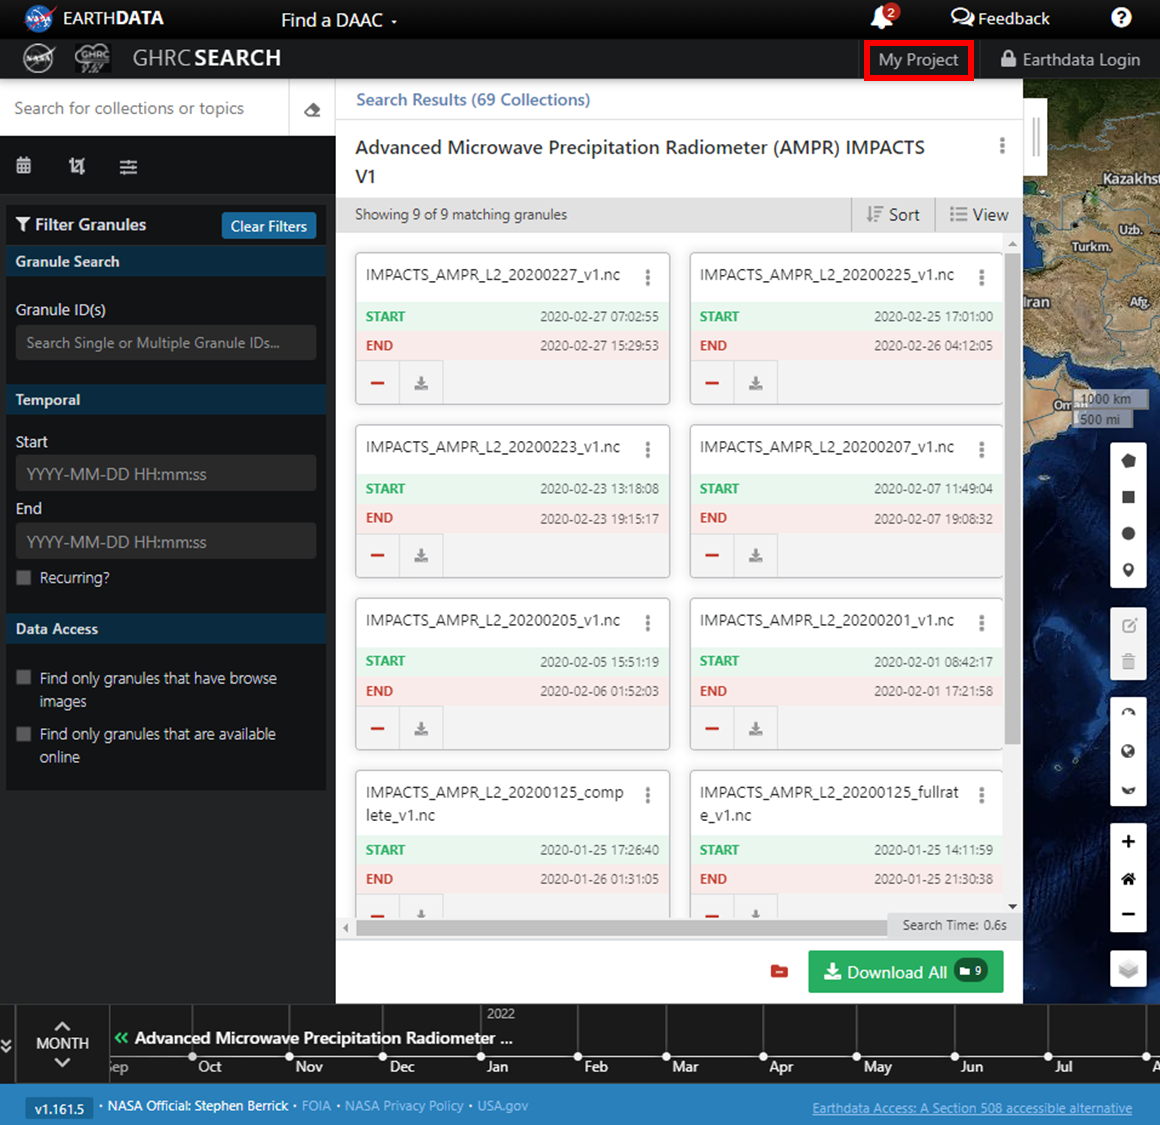
-
Click on Direct Download.
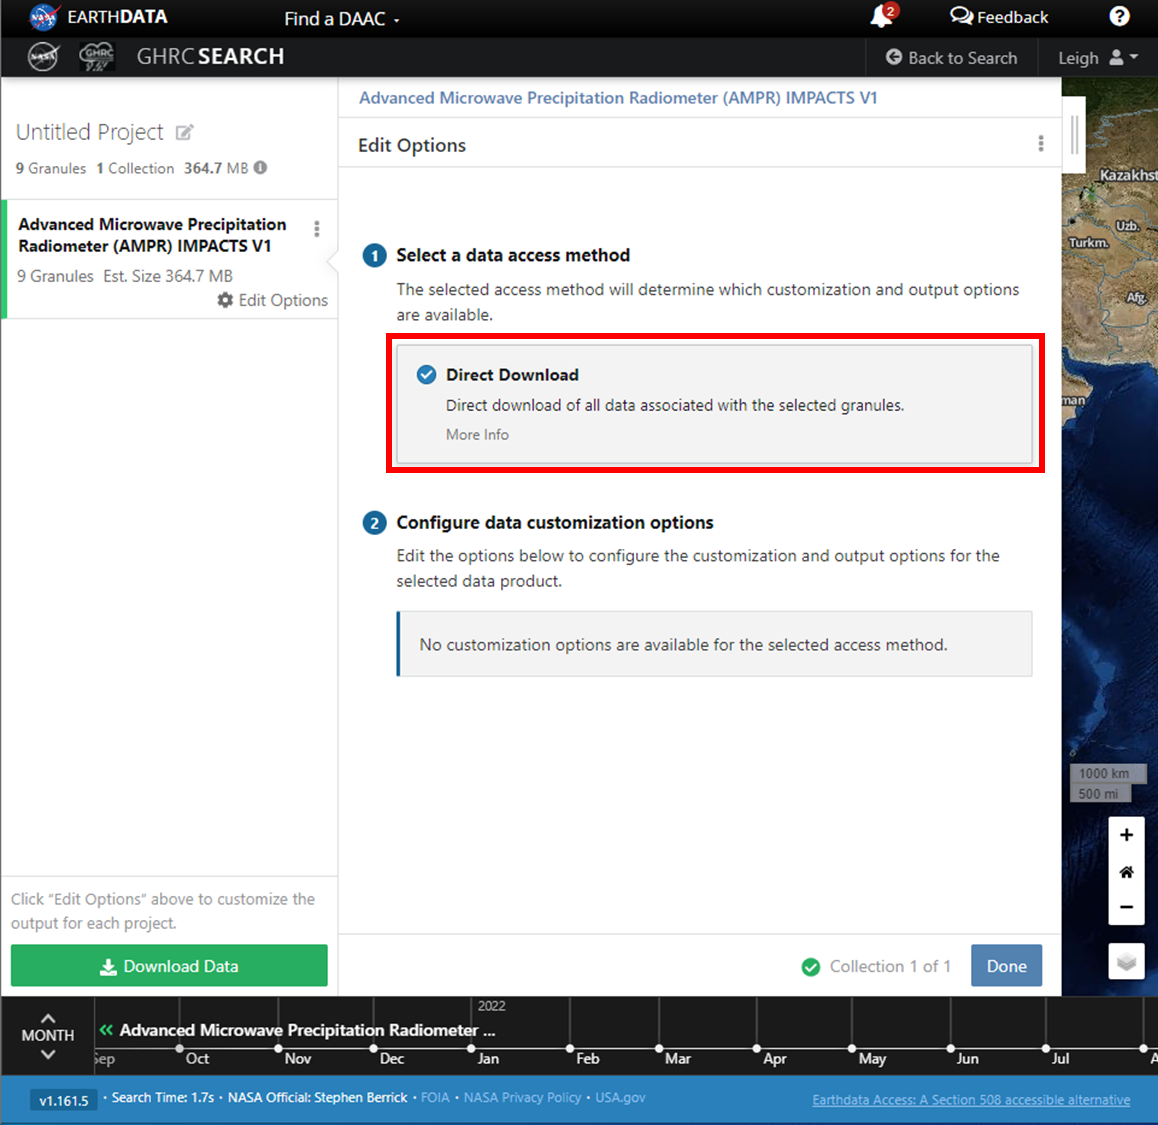
-
Click on Download Data.
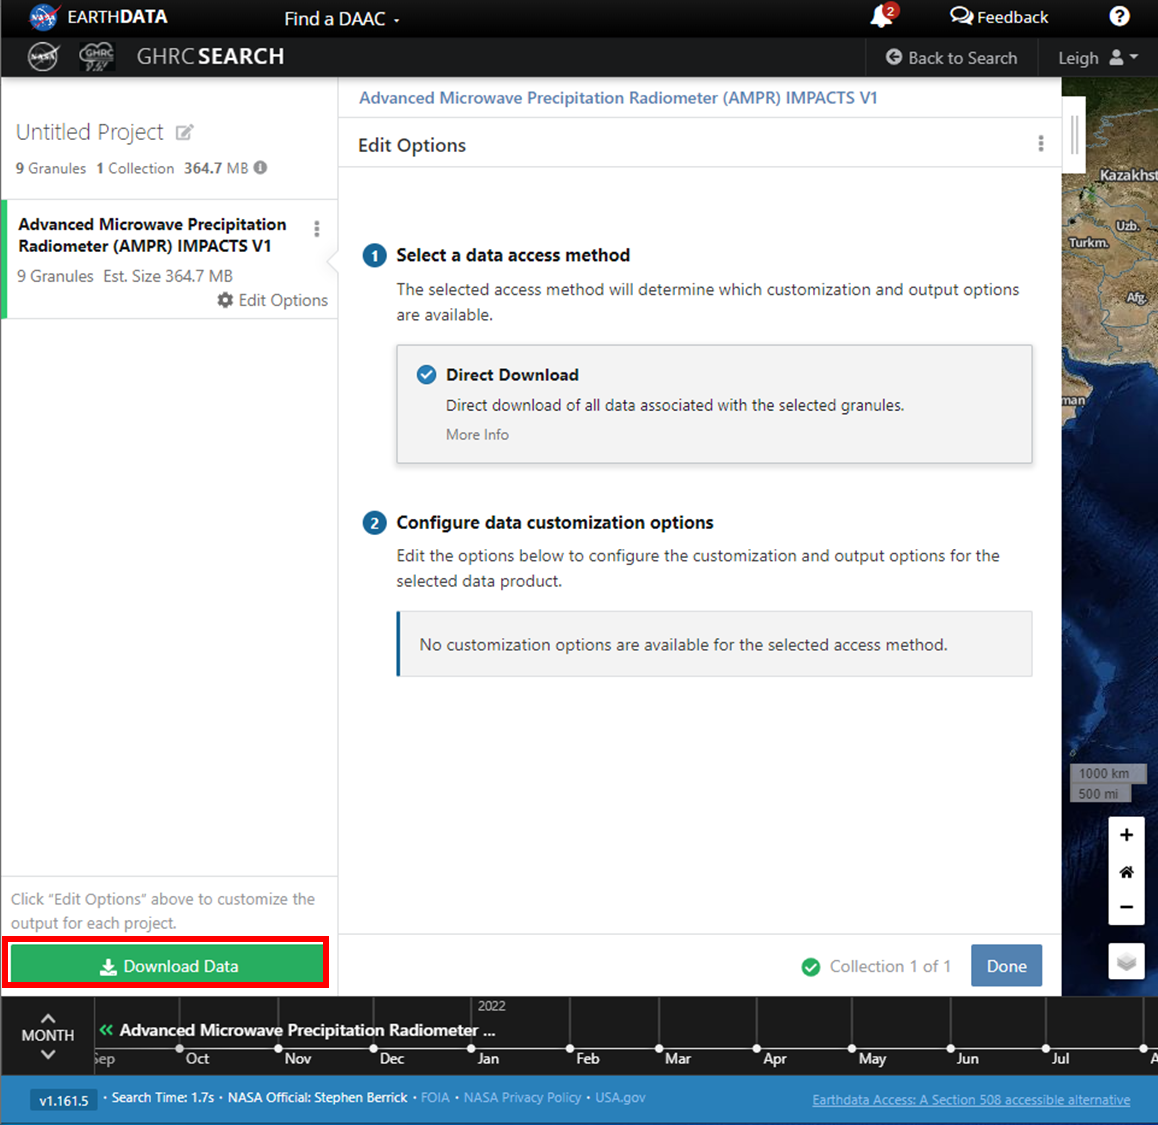
- The ‘Order Status’ page will appear. For a detailed walk through on how to download and run the script to download the data, please reference the ‘How-To Guide’.
Downloading a single collection and/or multiple collections:
-
Click on collection to view the granules.
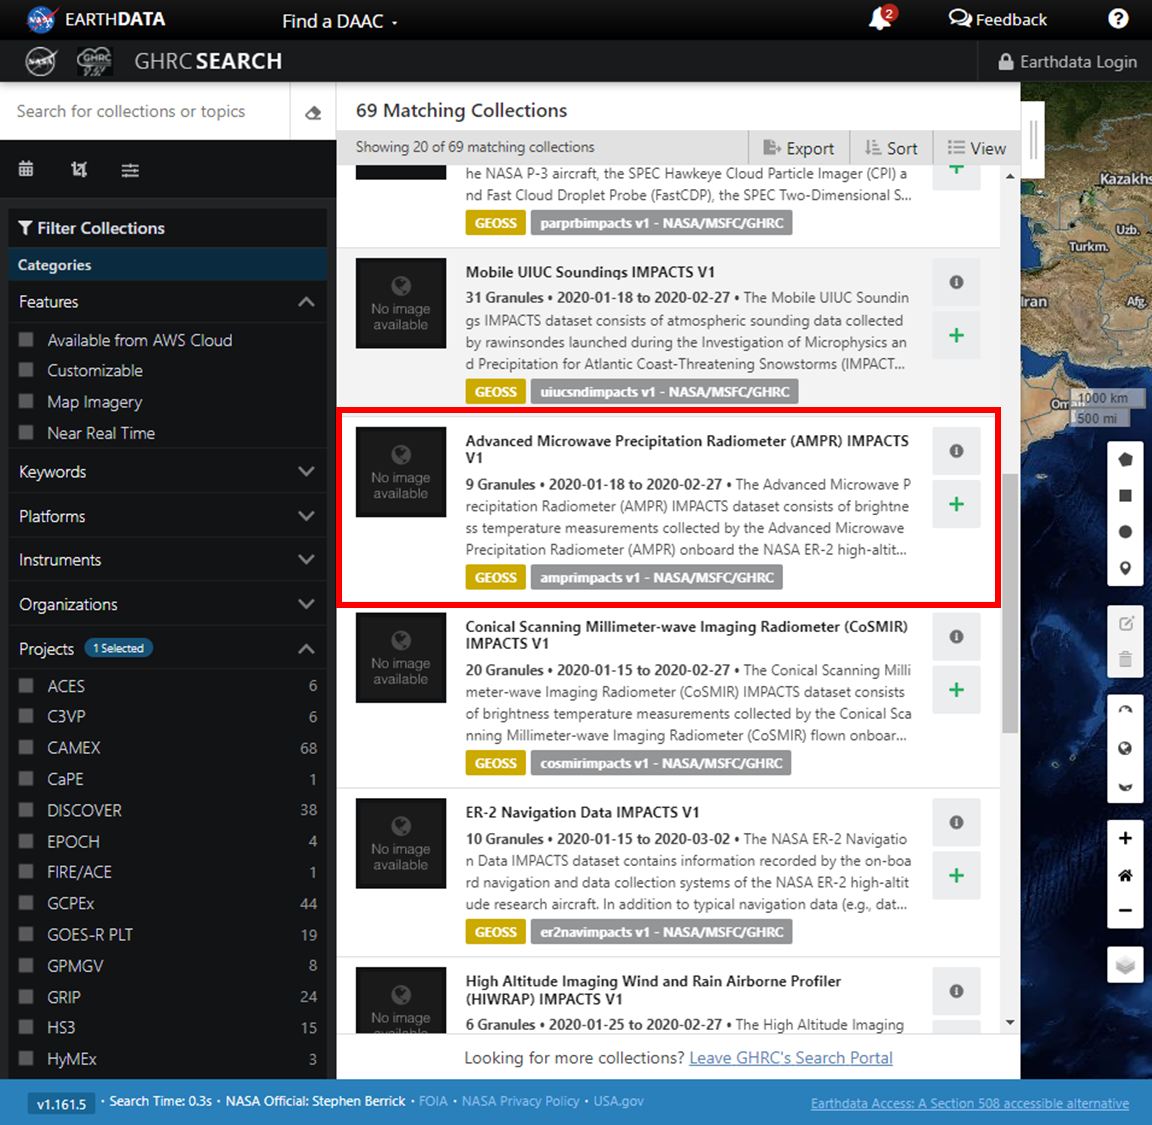
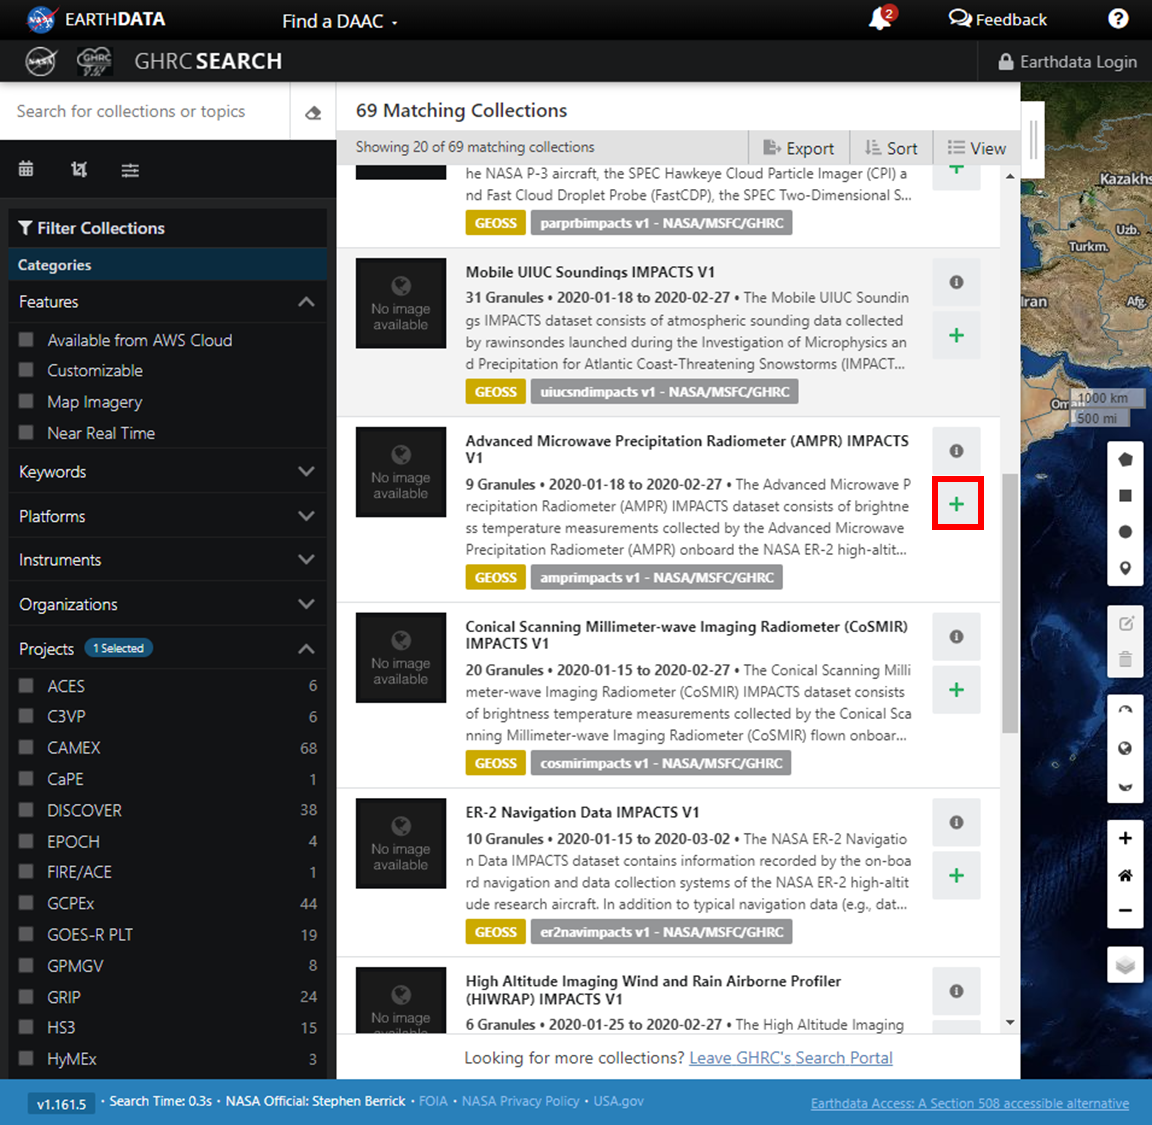
Alternatively, click on Add collection to current project to add all of the granules in the collection that match the desired filters to ‘My Project’. Repeat step to add multiple collections to ‘My Project’.
-
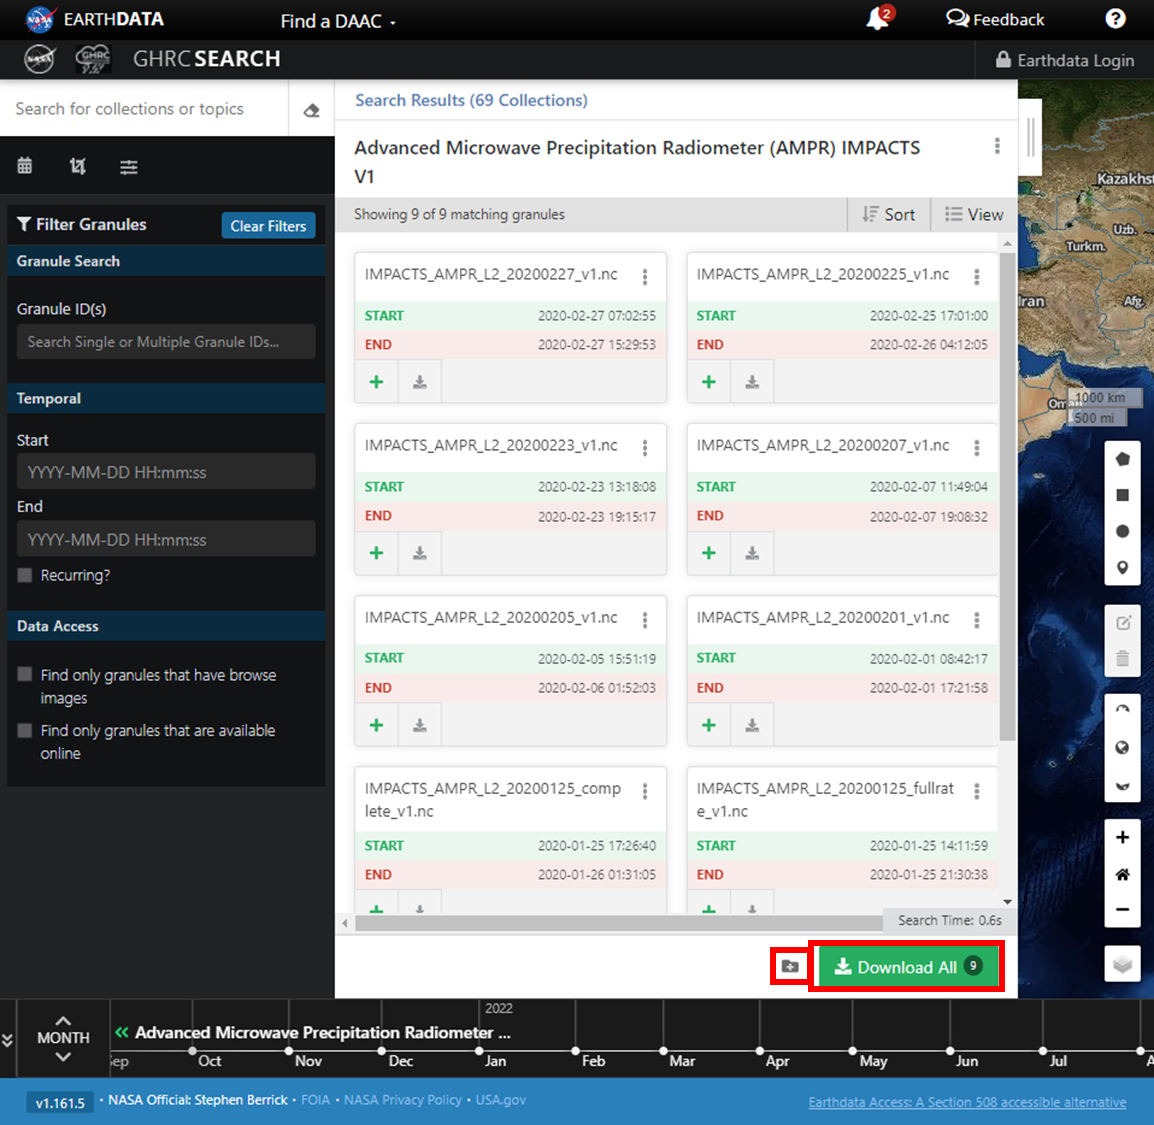
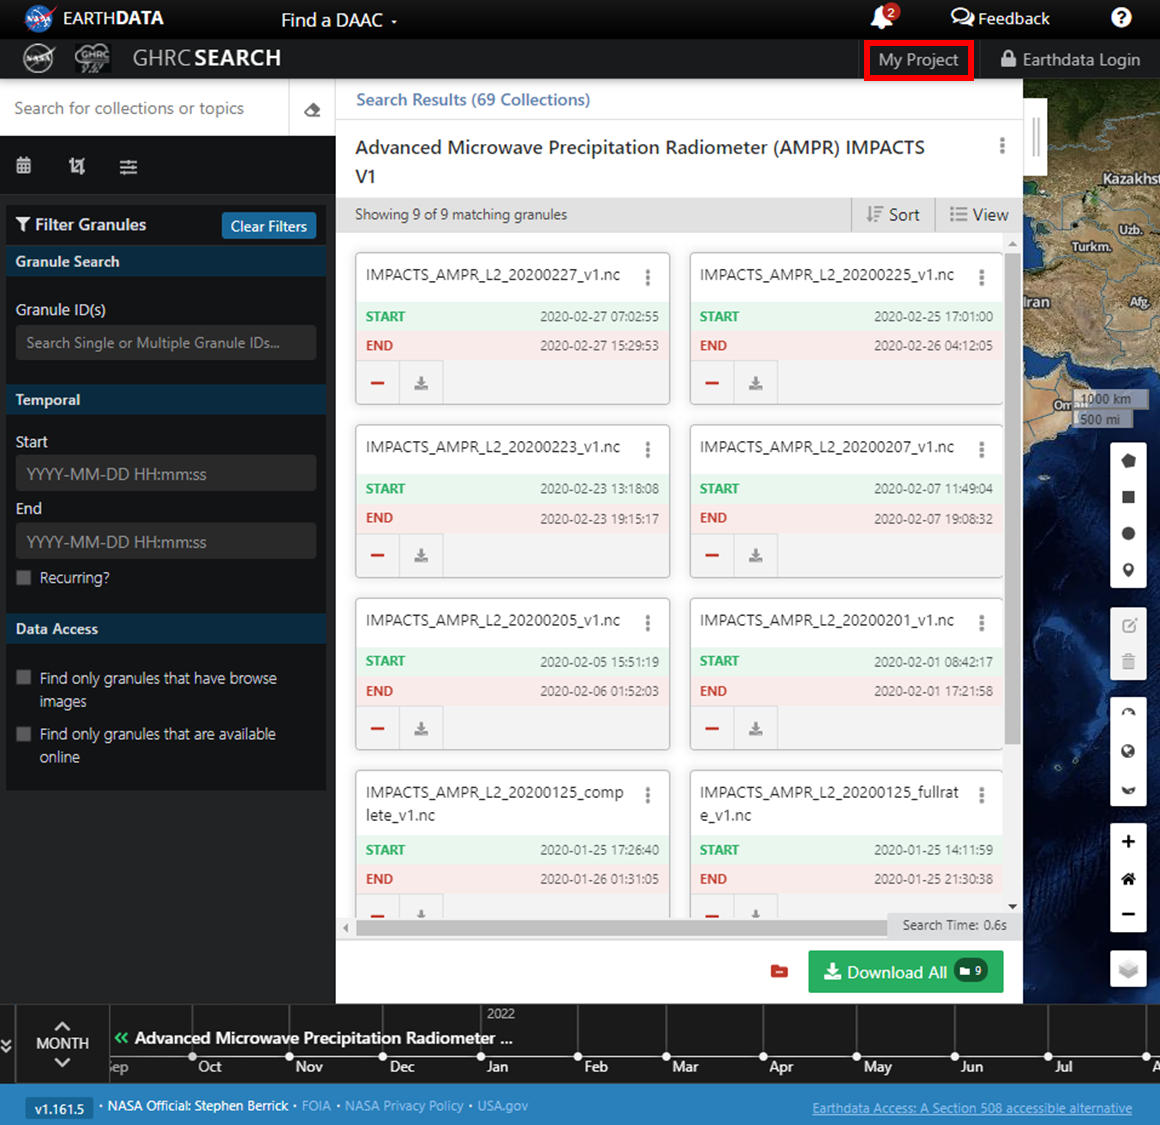
Click on Download All to add all of the collection’s matching granules to ‘My Project’. Alternatively, filter the granules as necessary and click ‘Add to project’. Only the granules that match the spatial and temporal filter parameters will be downloaded or added to the project.
-
Once the user has added all of their desired collection to ‘My Project’, click on ‘My Projects’ to view the download options.
-
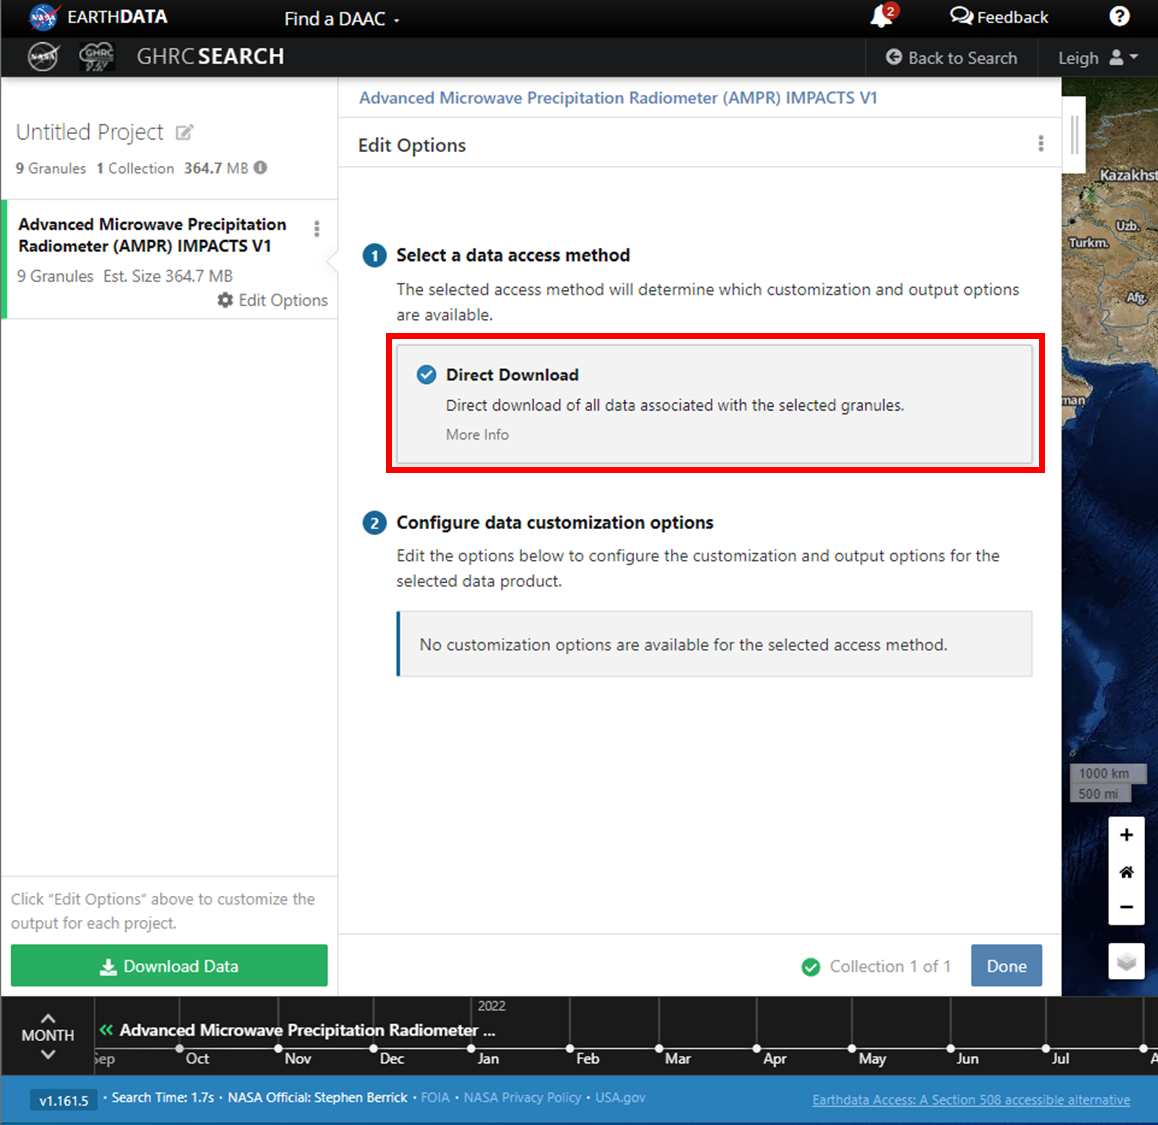
Click on Direct Download.
-
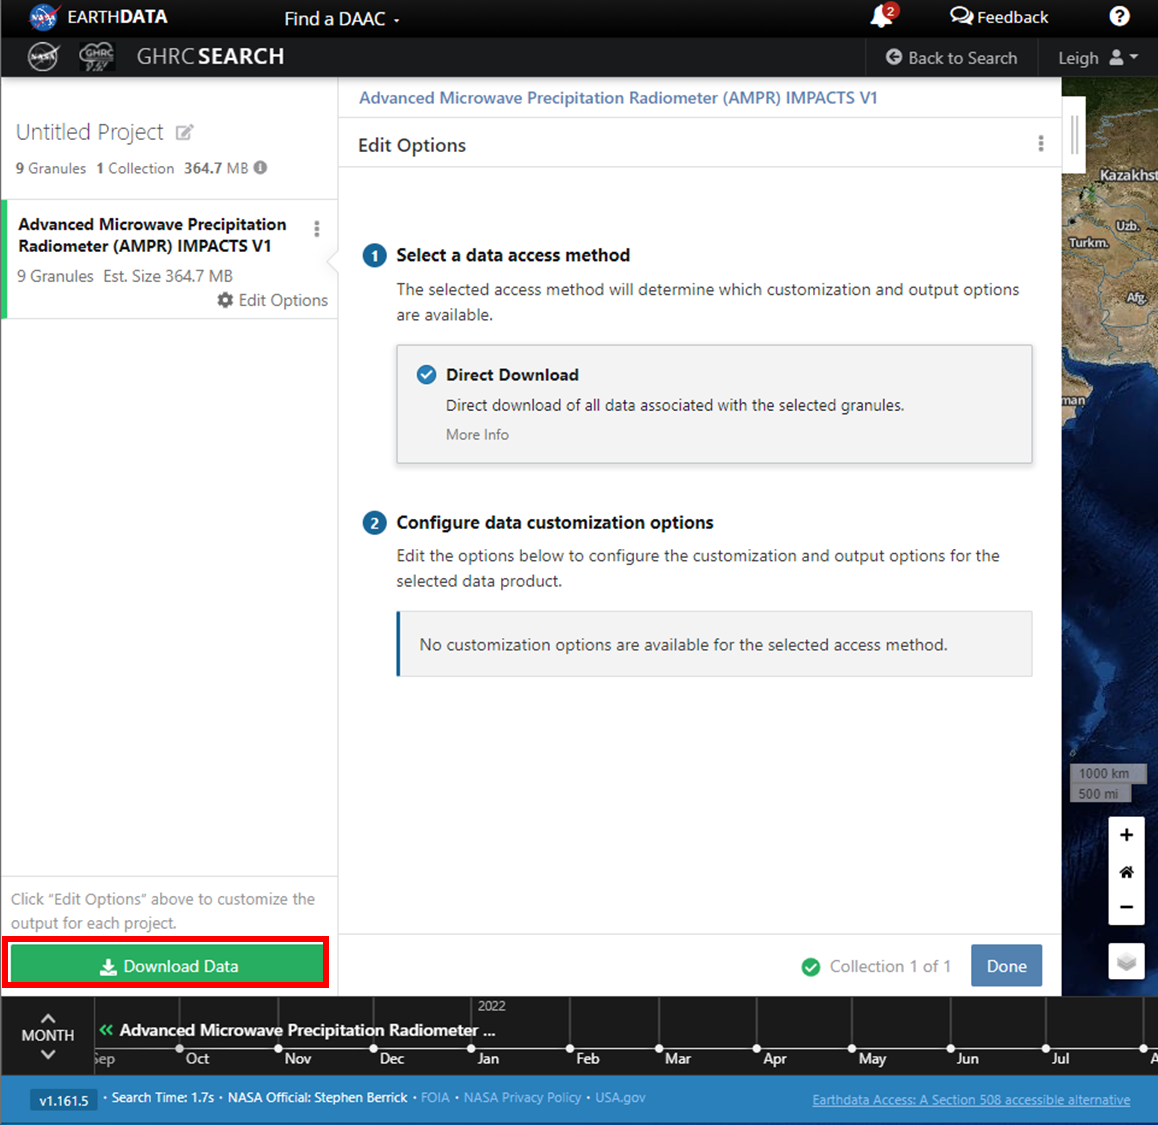
Click on Download Data.
-
The ‘Order Status’ page will appear. For a detailed walk through on how to download and run the script to download the data, please reference the ‘How-To Guide’.
How do I Customize Data?
-
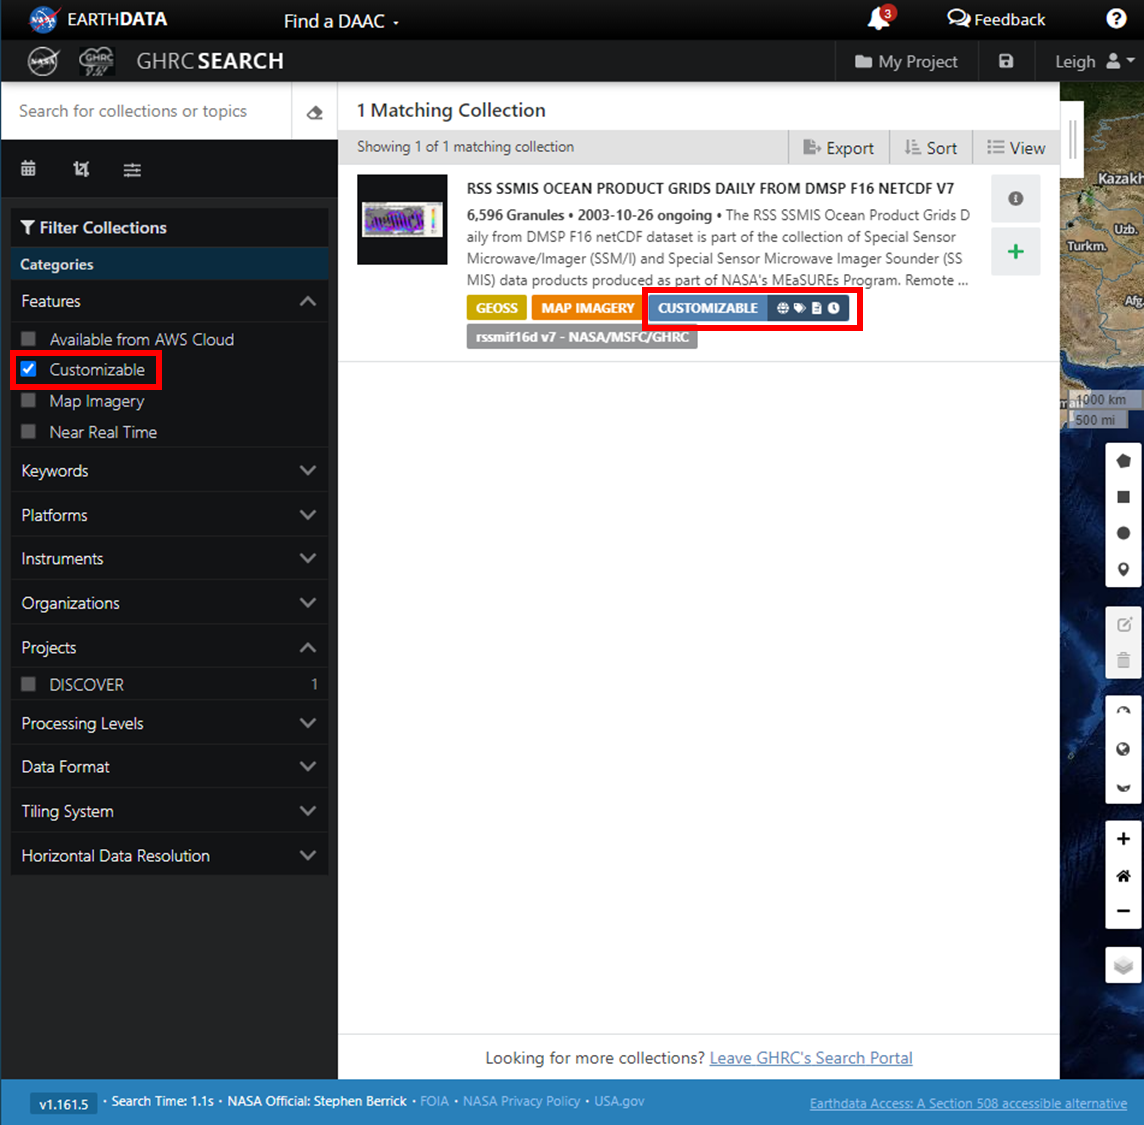
Find a collection that supports customization. A box labeled ‘CUSTOMIZABLE’ will appear under collections that support customization. To filter search results to only show customizable collections, select the ‘Customizable’ feature.
-
Click on a collection to view the granules.
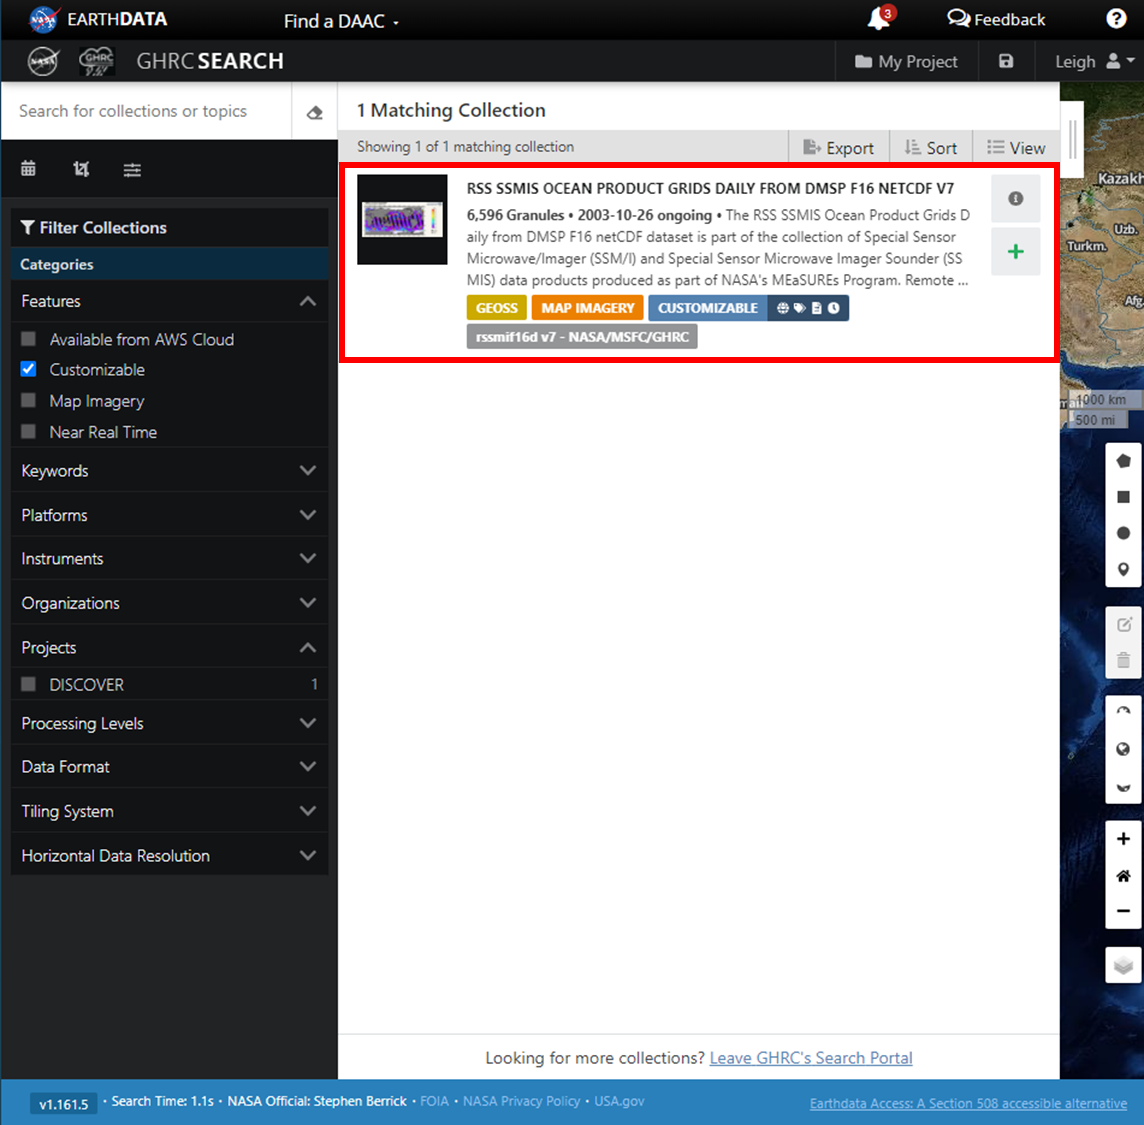
Alternatively, click on Add collection to current project to add all of the granules in the collection that match the desired filters to ‘My Project’. Repeat step to add multiple collections to ‘My Project’.

-
Click on Download All to add all of the collection’s matching granules to ‘My Project’. Alternatively, filter the granules as necessary and click ‘Add to project’. Only the granules that match the spatial and temporal filter parameters will be downloaded or added to the project.
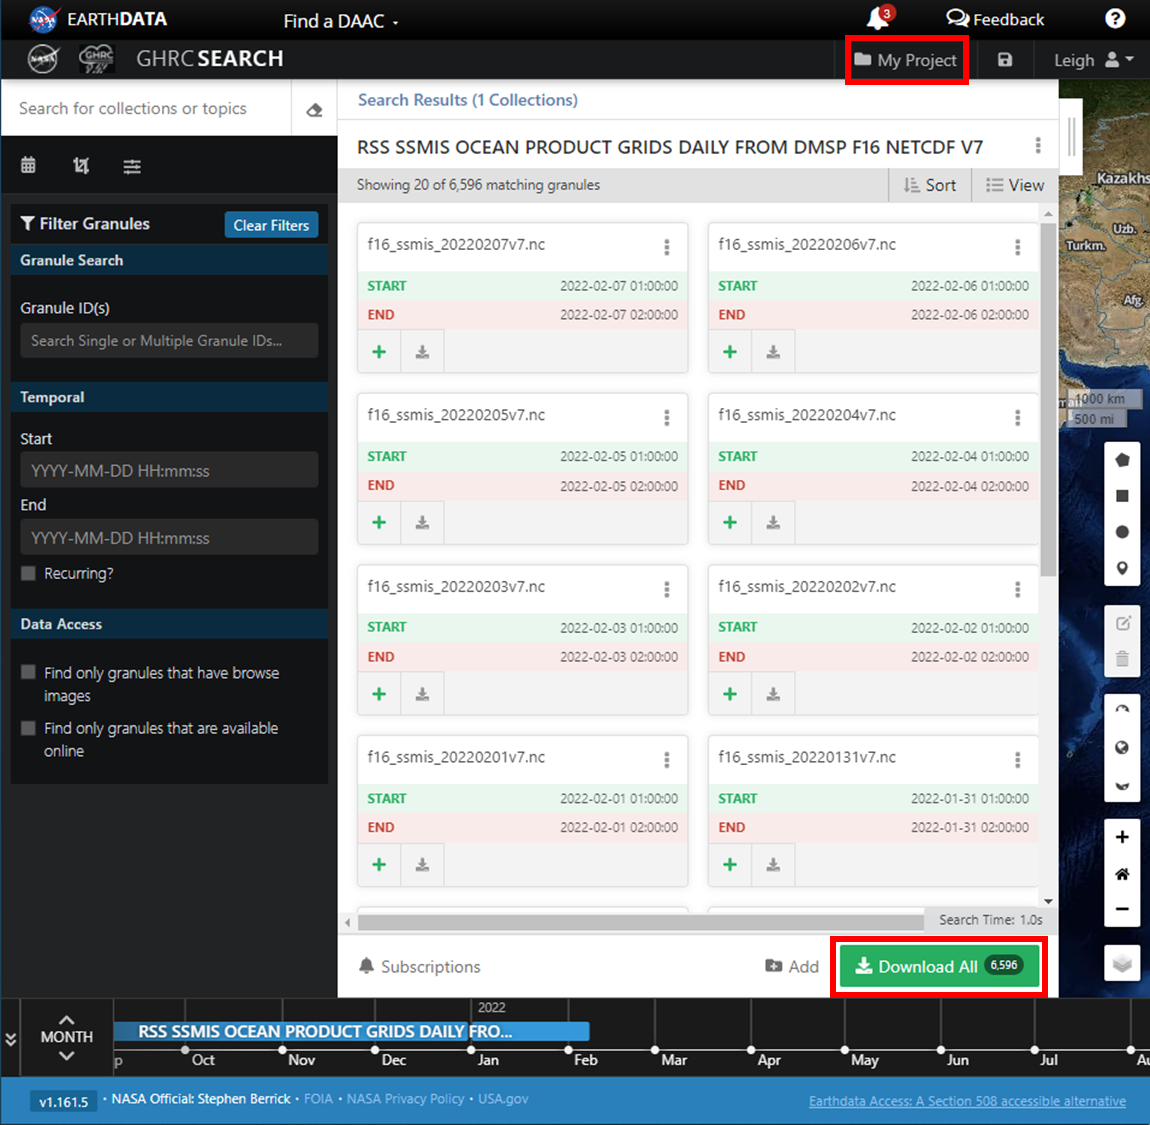
-
Click on 'Customize'.
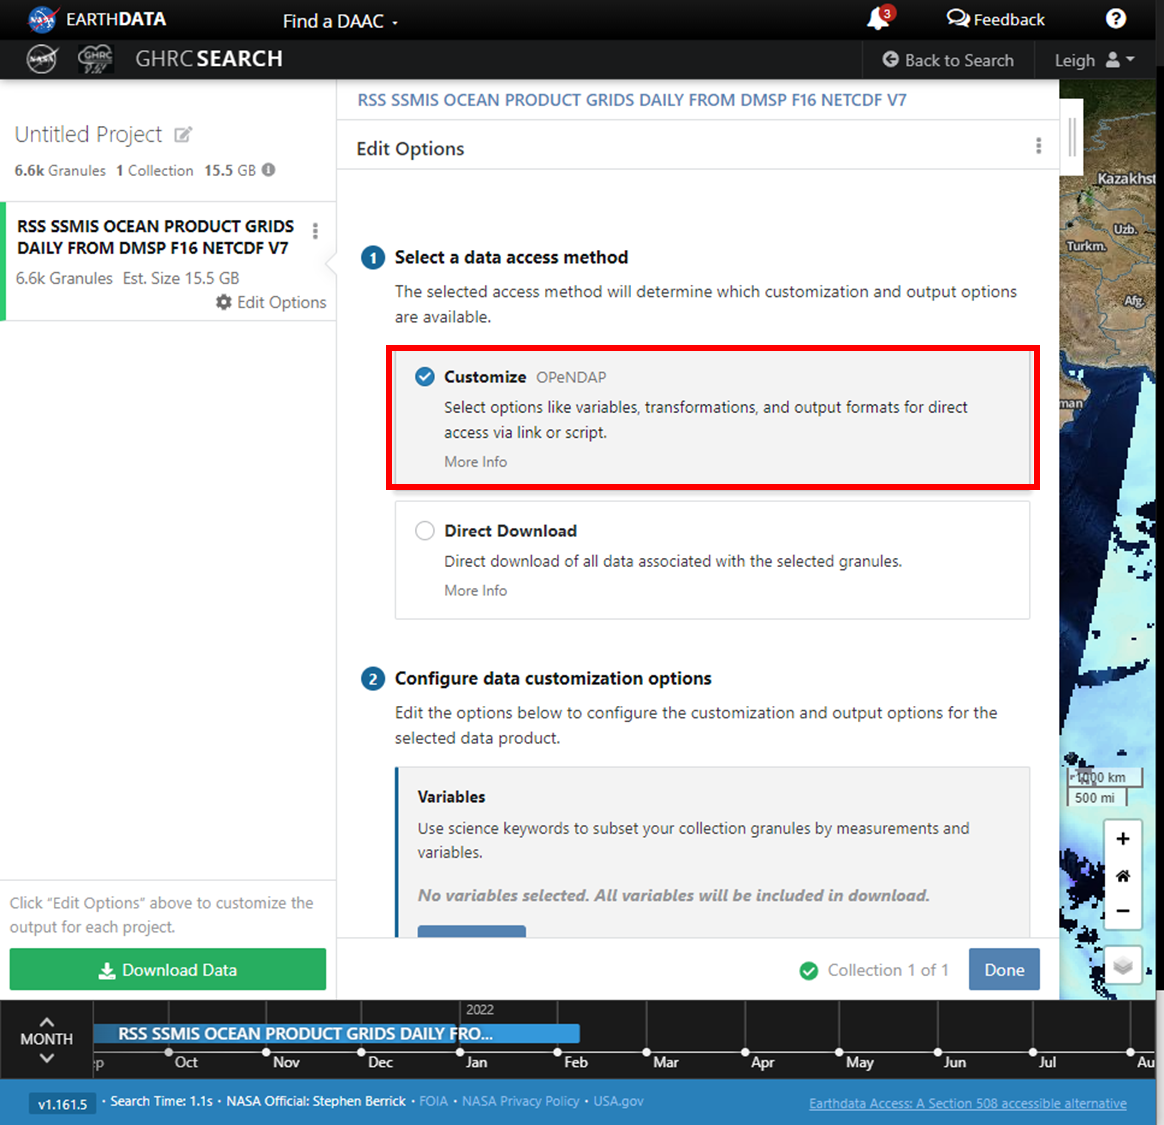
-
A user can edit the desired variables and output format of the data.
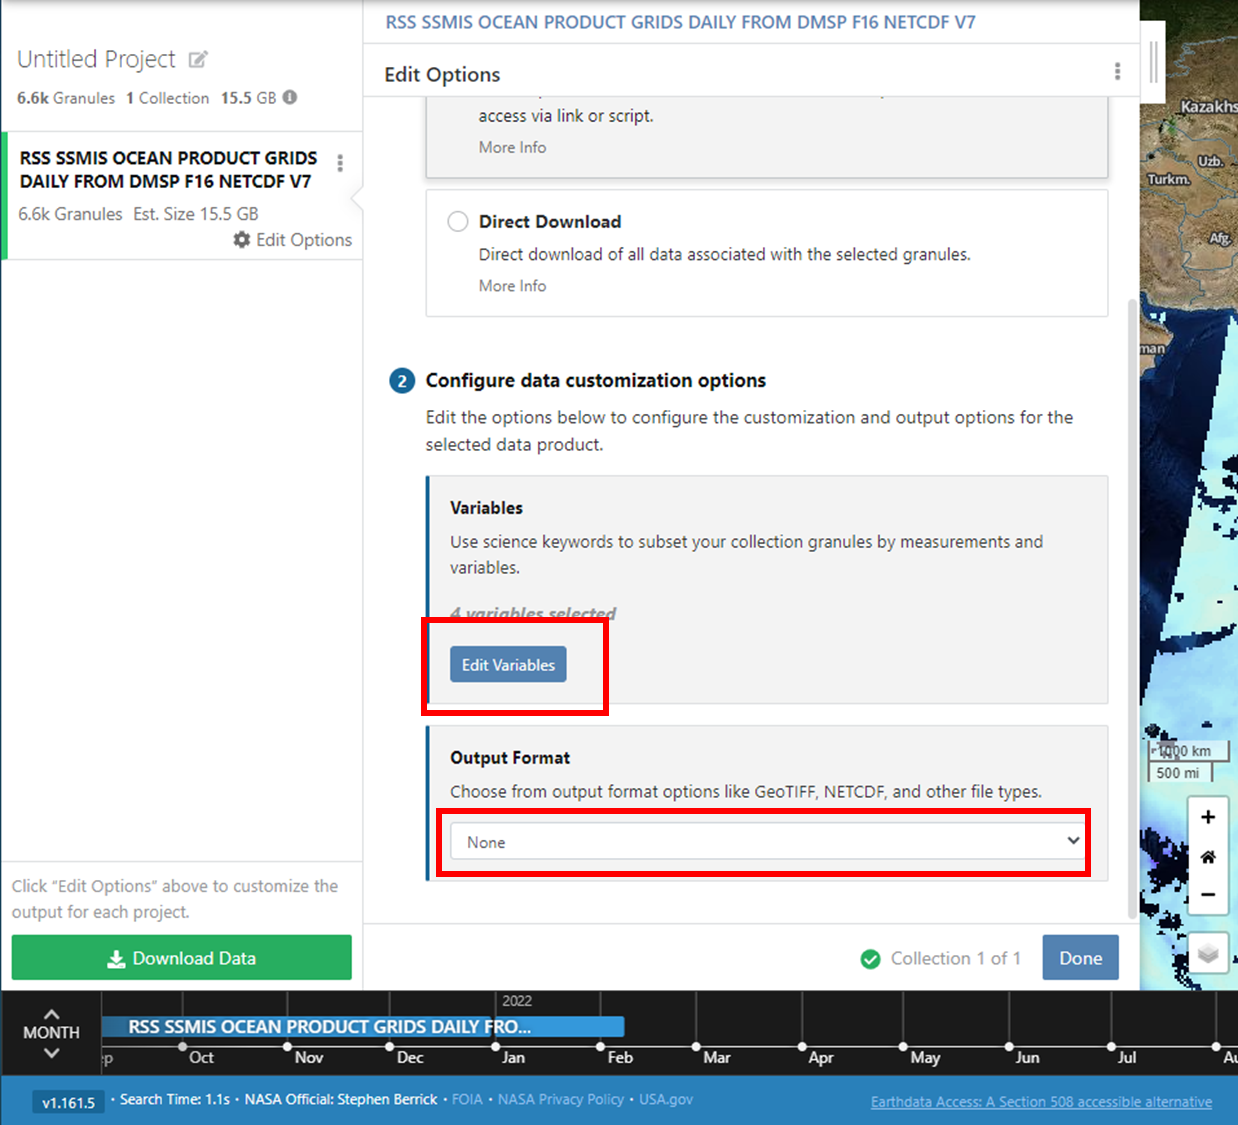
-
Once completed, select 'Download Data'.
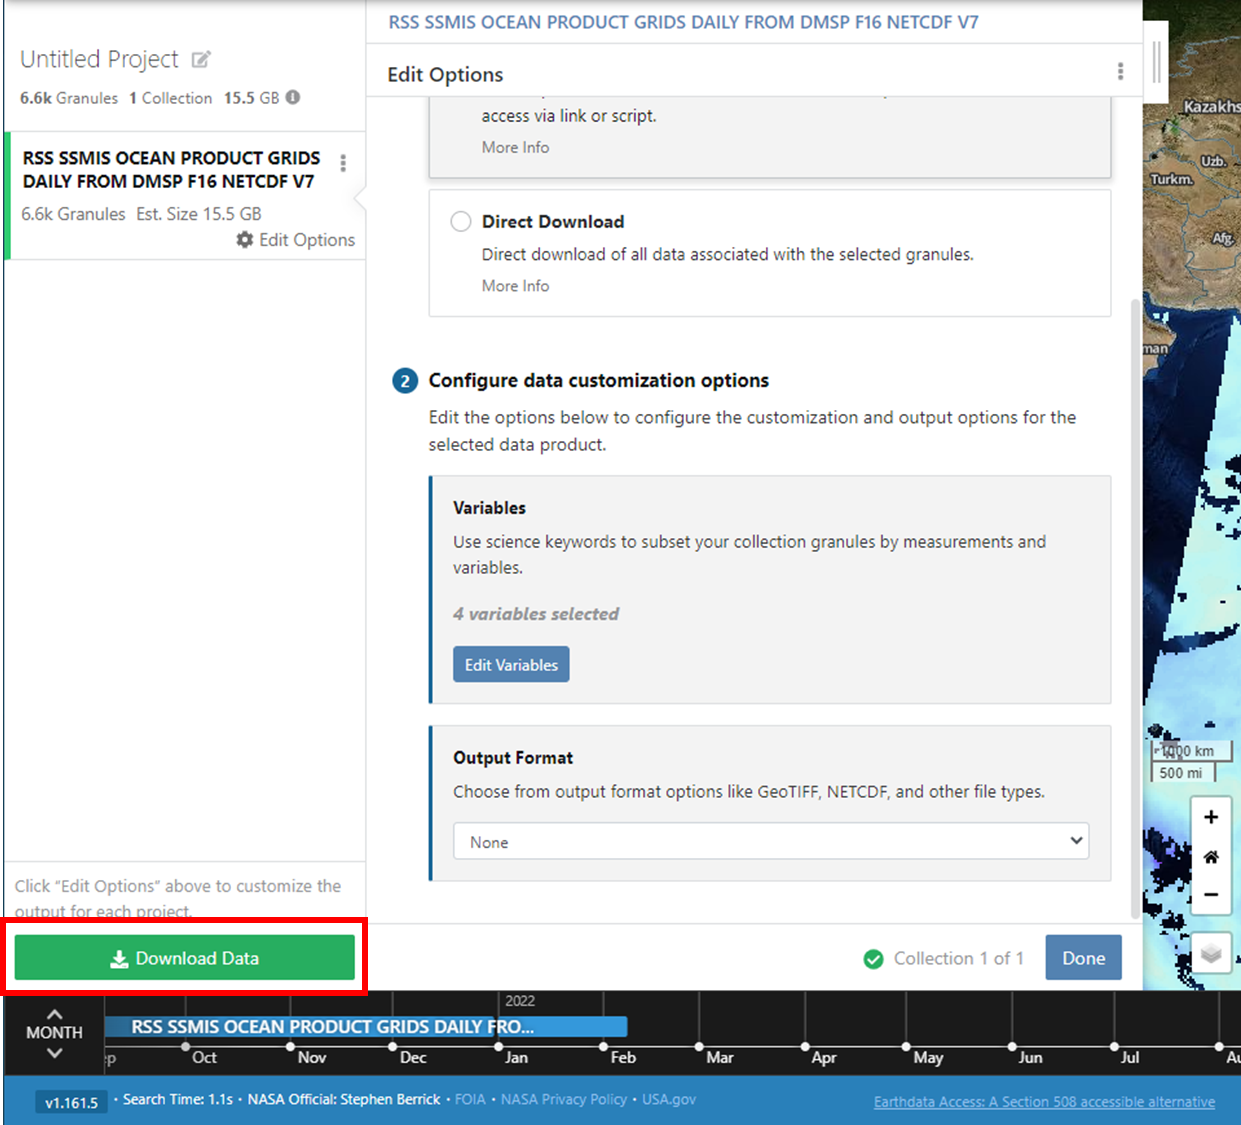
- The ‘Order Status’ page will appear. For a detailed walk through on how to download and run the script to download the data, please reference the ‘How-To Guide’.


